Tools | TPEditor | Installation

Installation
Installing Eclipse with GEF
If you do not have Eclipse yet, the best way is to download the "Eclipse IDE for Java developers" variant
of Eclipse Helios SR2 package. TPEditor has nothing to do with Java development, but this package of Eclipse
already contains GEF so you won't have to install it manually and it is not too big so downloading it should
not take long.
Eclipse is distributed as a .zip (or other type of) archive. To install it, just unpack the archive to
any location. Remember the location, so you will know where to install TPEditor (its installation is described below).
Installing GEF into already installed Eclipse
If you already have Eclipse 3.6.2 or later installed, try installing TPEditor plugin into it (as described below). If
it works, you are done. Otherwise, you will probably have to install GEF into your Eclipse. You can do it directly
from Eclipse: click "Help - Install New Software...", then in the dialog window choose "Work with: --All Available Sites",
wait for the list of available software to load, then find "Modeling" sublist and expand it. There you should find an entry
"Graphical Editing Framework GEF SDK" - check it and click Next. Then just accept the license and click Finish. GEF should
be automatically downloaded and installed. If you still have problems running TPEditor, the easiest solution is
to download and install a separate version of Eclipse just for TPEditor as described above.
Installing TPEditor into Eclipse
After downloading the .jar file of TPEditor (from here) just copy it into "plugins" folder
of your Eclipse installation. To start using TPEditor, run Eclipse, create an empty project and a file with ".tpe" extension in it
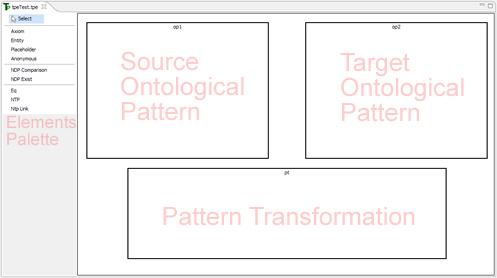
(the extension is essential, its telling Eclipse to run TPEditor for editing the file). After opening the new file you should see the main
window of TPEditor looking like this:

where you can start creating your transformation pattern.


